Kamis, 11 Februari 2016

14 Homemade Wood Headboard Plan Ideas, DIY

14 Homemade Wood Headboard Plan Ideas, DIY - Your dream home is just a weekend project away. We brag this video 32 Easy DIY Upgrades That Will Make Your Home Look More Expensive by Peggy Wang and other sources. Here's you'll learn how to camouflage your TV like a living Harry Potter paintings and how to place your rug properly and professionally. You are probably doing it wrong. And no one tell you that. 1. Paint your vinyl or linoleum flooring. With a single DIY link, you can turn a common vinyl floor Like this. to this one. 2. Add cheap framed mirrors to closet doors, painted to match. The mirrors now suddenly look like they are built in! 3. Use tab curtains to cover up unsightly wire shelving. Seriously. I can't be only person on earth who think a garage is a magnet for junk . The garage is an enigma to me. We clean it and then suddenly it is a disaster again. Well, we are finally able to upper hand it.. 4. Basket-weave your drapes. I am Sorry, if it would be harder than it looks here. 5. Add a simple hardware to your curtain tie-backs. You can get brass snap hooks for around $2 at any hardware store. 6. Hide your television wires in a shower curtain rod. Credit to freshcrush.com 7. Use brackets to decorate a window that doesn't need to be covered up with curtains. 8. Use napkin rings and ribbons to pretty up your shower curtain. Or just tie them right onto the shower curtain rod. Anyway… A perfect solution if the rings were getting kinda rusty. 9. Mix and match your sheer curtains. It will look especially dreamy in a teenage girl's bedroom. 10. Know where to place your rug. For example, I've found that most people that use an area rug in their bedroom are either using the wrong size, or are placing in incorrectly under the bed. Here's a diagram to scale using a queen sized bed and an 8 X 10 rug:


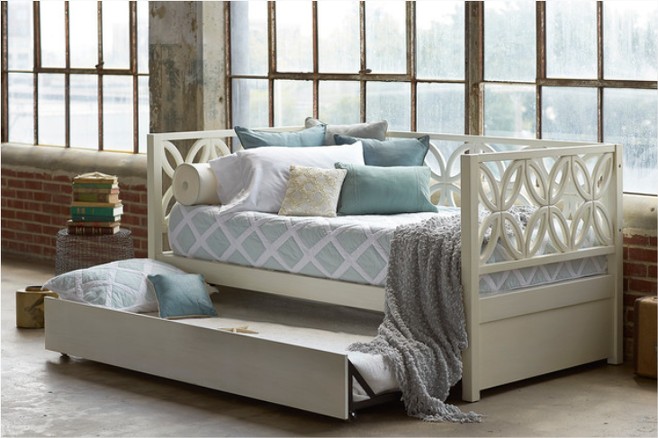
Do this, Pallet Wood Headboard Plans Instead of this Let's take a look at the diagram for dining room rugs. Push those chairs out like you were going to sit down, and buy a rug larger than that space Trust me, you and your guests will be much happier. NEXT, As far as living rooms go, this is a diagram that shows a pretty common type of layout, furniture-wise: the rule of thumb is to put the front legs of the couch or chairs on the rug, and it still creates a separate and more intimate space that way 11. Decorate your fridge with washi tape or spray paint. from theeverygirl.com. 12. Paint faux windows on your garage door. from conventional white garage door, to this look, and finally this one. from twopeasinabucket. 13. Frame your TV. Disguise that Flat Screen! Most of us have faced a dilemma of what to do about the all important TV when we are decorating our home. It's not an easy thing to get past as a designer. Some designers won't even allow them in their design unless they are fully enclosed and hidden! However, We know you and your family live in the real world, and if you are like me, you want to have easy access to your TV, or have it available for the kids without some big production. Remodelaholic have a great tutorial for you. This takes just simple power tools and basic carpentry skills. They chose re-purposed wood for theirs, and we love this! The idea would look great in almost any style home, from industrial chic to Pottery Barn traditional. Feel free to choose whatever framing material fits your style and budget. Check out the do it yourself Tutorial inside info And another great tutorial from Tommy & Ellie on how to build this custom TV frame.

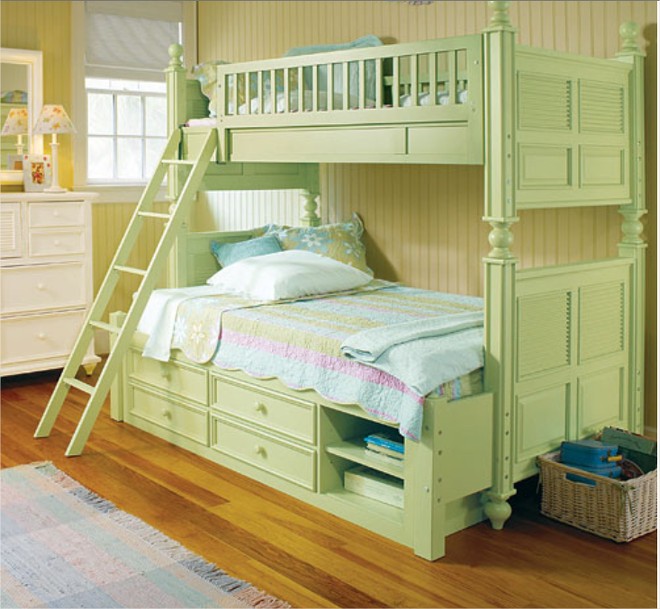
Here are more ideas. And if building a frame isn't in your skill set, we have some more great ideas for disguising the TV! This is a great example of turning the TV into art! Notice how the color of the frame around the TV ties in with the other artwork! from decoratingyoursmallspace.com 14. Attach some simple yarn tassels to your bedskirt. Fancy bedding can be so expensive. Get this straight-out-of-Anthropologie look by buying or making tassels and attaching them to your bedskirt. To make the tassels, you'll only need Solid Wood Headboard Plans: 1. Yarn (Lion Brand – 81 yard skein made 6 tassels) 2. Something to wrap your yarn around that is the desired length of your tassel ( a clipboard worked perfect for these 8 inches tassels ). and, 3.Scissors. Click DIY link we pasted. and you'll get 7 easy to follow steps that won't break your sweat. Thanks to holly from sister suit case and tatertotsandjello for the idea 15. Use a cake stand for your kitchen sink needs. 16. Cover up an unsightly air vent with a rubber doormat. Give your decorative outdoor rubber mat a new life. When searching for a rubber door mat, try to find one that allows plenty of airflow, meaning that the door mat has a large amount of space in between the rubber sections. 17. Just a coat of spray paint will make old air vents look new again. A can of primer and a can of metallic spray paint will cover at least 10 of your vents. 18. Hang curtain rods to create a makeshift canopy bed. A super simple DIY by Michelle Adams, Editor in Chief of Lonny Magazine, it's feeling almost within reach! She simply drilled West Elm Industrial Pipe Curtain Rods into her ceiling with 6 panels of her favorite fabric hanging from them. Of course she chose very fine fabric and a soft velvet as a lining, but I'd be glad with IKEA curtains! 19. Accent ceilings are the new accent walls. One of the most under decorated spaces in houses tends to be the ceiling. Unless you live in an older home blessed with beams, tin, and, or ornate moldings, it is rare to see anything today beyond white paint and crown molding. An inexpensive ways to add character to your house. Instead of adding the color to the walls, painted the ceiling and see what happened.

20. Inexpensive craft store frames fit perfectly around your light switch covers. started with regular switch plates that you have in your home. The good news is: you can mess them up, they are cheap to replace. This is the hard part. Finding frames that fit what you want to do. I suggest taking your plates with you and holding the frames against them right in the store If you are great at “mitering”, and want to make them all uniform, you can always use pieces of trim to create the frame. Next, Free Wood Headboard Plans glued them onto the plates using Krazy Glue. As with all products, please follow safety directions found on the package. Next spray painted them. Again, please read instruction on the can. Use a face mask and spray in a well-ventilated area. Lastly, sprayed a gloss clear top coat. Once they were nice and dry, put the covers on the switches like you normally would. I couldn't be happier with the results! Of course, Now, I think I need to paint my trim.. but that's for another time. 21. Decorative Punched Metal Ceiling Light Shade A decor idea of Corinna from For My Love Of. net. Supplies Needed: E-6000, Spray adhesive, Clothespins, Sheet(s) of decorative punched metal, Contact Paper or Wide Painter's Tape, Styrene Lighting Panel, Parchment Paper, Dremel Tool with Cutting Disk, 1 (16 inch) Bottom Wire Ring (lamp shade making kind). 1 (16 inch) Top Washer Wire Ring (lamp shade making kind). and 11 inch straight pipe (lamp making kind) if working with the standard “boob light”. if you're working with a semi-flushmount “boob light”, then you may not need any straight pipe. The process requires little muscle. To get a nice punched metal ceiling light shade like this. You have to follow 7 instructions completed with photos and manuals. Fresh your Mind!, Before you take this challenge. You'll have a rough road a head. 22. Use a curved shower curtain rod to make a window look bigger. It's called balloon drapery and it will make any living room look just GRAND.

23. Fascinating, Liquid stainless steel paint exists, Free Wood Headboard Plans Click the DIY link under this video and you will know how to update your kitchen look with some stainless steel paint upgrade. 24. Half-painted walls give the illusion of a taller ceiling. 25. If you're going for a rustic look, planking a wall is a cheap and easy weekend project. Do I like the color? No.. Does it matter? No.. I knew it was getting painted, so I didn't care one bit. Plus, it was super cheap. The entire walls worth of wood cost us only $28.00. "Nice Bargain". SUPPLIES needed: 1 x 6 Fence Boards, Saw, (Chop Saw, Miter Saw, Table Saw or even a Radial Saw will work) Sanding Block, Construction Adhesive, Spacers, (Quarters worked perfect) Paint and Paint Brush, and, Trim. Learn how someone done the job at fox hollow cottage. 26. This insanely simple window shade is magnetic, movable, and no-sew. First thing: Grabbed a brightly colored fabric remnant from Joann's. And decided that it would be the perfect project to try out fabric glue. And magnets, of course. then folded down the top edge and spaced four magnets right under the fold and glued them. used scratch paper underneath so the glue wouldn't stick to the table. Next, Glued, a bit of green ribbon across the seam to give it support Last step, Pom Poms! Love them. The world could definitely use more pom poms. And, this little window covering was begging for pom poms. It's simple, just glued a string of white to the bottom edge of the blind and done. Few inches of the bottom of the window uncovered so some light would still stream in. 27. Un-stain and re-stain your furniture. Getting the stain off a piece of furniture is surprisingly easy. Stripped the drawers with Citri-strip Spray stripper. Let it work a while to loose the old finish. Then strip it off with plastic scraper. Continue to link we provided under this video to find the result and how to DIY it right. 28. Framing your bathroom mirror will make it “sit” nicely with the rest of your decor. Especially, if you're going for a rustic style. Get full directions from craftsmandrive.com. 29. Update your kitchen backsplash by using 3D gel-like tiles that are actually peel and stick. Get it for 7,48 $ per quantity. More or less. 30. Cover your unsightly cords with suede cording you can buy at any craft store. Turn your mainstream black electrical cord to a custom cord with sense of humor using some red sueded cording bought at JoAnn's for less than $2. This little tweak has 5 easy steps you can follow anytime. Check description to know more. 31. Add a strip of trim a bit above already existing baseboards, paint between, and you get faux thick baseboards! Chunky molding on the cheap. Little complex indeed. But, relax, the house of smiths got you covered. Few slides here just preview. 32. Add molding + shelving to the top of your kitchen cabinets. The extra storage is an awesome bonus, but it also adds an extra level of polish to your kitchen Not recommended for seasonal crafter. if you the pro, you'll have 9 steps or challenges to follow. Tutorial and photos are provided by family handy man. Thanks for your time, if you love to see more, please like or share this video with your friends. Comment it, if this voice over annoys you. Or say anything if it will lift your burden We are listening.

Top 10 Daybed with Trundle and Drawers

Top 10 Daybed with Trundle and Drawers - In case you were unaware, washi tape is decorative Japanese tape that crafters are completely OBSESSED with. It also has a magic power that makes everything it’s stuck to the most adorable thing in the world. This is 56 Adorable Ways to Decorate with Washi Tape by Peggy Wang. Sources for pretty masking tape include Happy Tape, Cutetape, and Ginko Papers. 1. Colorize your window blinds. 2. Makes an adorable cupcake or sandwich decoration with this tiny flags. Direction: Wrap washi tape around a toothpick and cut triangles out to create a flag. Or use them as beverages stirrers. 3. Transform a computer keyboard. Direction: First, I thoroughly cleaned my keyboard with rubbing alcohol to remove any dirt or oil that might keep the tape from sticking. Then I created a template from cardboard to more easily cut the length of tape needed for each key. I also snipped off the corners to keep them from snagging and peeling off the keys. Washi tape is similar to masking tape or blue painters’ tape in that it is easy to stick and re-stick in case you don’t get the placement perfect each time. Washi tape by Le Box Boutique @ etsy 4. Cover a boring notebook. If you don't buy or use or trust a classic notebook anymore, Check 17 washi tape tutorials link under this video. One or two of them might steal your attention. 5. Line the inside of a lampshade. 1. I positioned my first piece of washi tape inside the shade at a 45-degree angle. 2. I left the piece of tape slightly long so it hung over the edge of the shade. 3. I used two smaller pieces of a different color washi tape as spacers. 4. I put my spacer pieces right next to my first stripe. Then, I invite you to visit a link under this video It will short your learning curve. 6. Or Line the outside of one 7. Decorate a planter. With the washi tape and some white ceramics Check out these awesomely ’80s planters using recycled ramen noodle containers. They’re epic.


8. Make your own washi tape. You can use tissue paper, napkins or even old newspaper. Step 1: Apply the tape to the back of your choice of paper. Daybed With Trundle And Storage Drawers Uk (Leave the backing on until you’re ready to use the washi tape) Step 2: •Cut the strips to size. Step 3: •Wrap the strips around the wooden spools and secure with some twine. + 9. Decorate your cups. Wrap washi tape around some inexpensive plastic cups for a party. 10. Make decorative twisty ties. Tips: 1• Lighter-color washi tapes can be somewhat see-through, so it’s better to use a lighter-color wire like silver. 2• you don’t have to use washi tape to make these twist ties; any colored tape will work. 3• Spend 40 minutes making a stockpile of twist ties to have on hand for last minute goodie bags. 11. Make the most adorable gift wrap that ever existed. Using the washi tape, create a design of your choice all over a piece of printer paper. I made 4 different designs - classic washi strips, stripes, houses and starbursts. Once you've created your wrapping paper, reuse the tape strips.. Grab some blank shipping tags and get crafty making up pretty tags to match your paper. 12. Washi tape a car. 13. Or a bike. 14. Or a staircase. 15. I was sick and tired of pulling up the cord and then following it all the way to the device to see if it was the one I needed until I label those cords. This alone is a reason to order a shipment of washi tape. 16. It makes a pretty insane wallpaper. IMAGINE.. Jumbo rolls of pretty washi-tape throwing a party on your walls and you get THIS clever creation. Unlike classic wall coverings, this graphic Wall Tape has a translucent & fresh quality. Cut + layer + create any design your heart dreams up using multiple layers and patterns! Plus  this wall tape gets extra points for being rice paper based!

17. Give yourself a washi tape pedicure. Coaster La Salle Daybed With Trundle And Storage Drawers In Black 18. Decorate some wooden spoons. Or your switch plates Or Door edges, or sofa legs 19. Make washi tape coasters. Direction: 1. Start on the top left corner so that your stripes would be diagonal. 2. Wrapped the tape a little over the bottom then repeated until the entire tile was finished. 3. Then finished them with a coat of Mod Podge. If you’re worry about them sticking together you can use a varnish instead. 4. Once that dried glued felt onto the bottom of each coaster. 20. Best IKEA hack ever: washi tape a boring table. 21. Use it to mark a calendar. 22. Make your clothes pins cuter. 23. And your binder clips. Washi taped binder clips, courtesy of organizing Queen Marcia. I got an assortment of 60 red, black & white mini clips at Office Depot for $4ish. To my delight, I found that the minis are precisely the same width as the washi tape, so one tiny piece covers the whole clip. 24. Decorate a ceiling fan. 1. Remove fan blades from fan and clean thoroughly. 2. starting from metal ornamental edge, use a pencil to make marks at 1-inch intervals along both edges of the blade. Step 3 : Place first piece of tape between first and second marks and around sides of blade. Then click pasted tutorial link under this video. You have 2 more directions to follow. 25. Make magnets that look like pieces of tape. This is a real but magnetic version of real Japanese masking tape inspired by digital tape. Put your hand on your forehead and massage if your mind is threatening to explode with the outrageous meta-ness of it all.

26. Decorate a candle. Twin Daybed With Trundle And Drawers 27. Make a garland. 28. Or bunting for cupcakes. 29. Create tiny bookmarks. 30. Or Cover your laptop. 31. Decorate some vases. 32. And continue with your furniture using 10 ideas you’ll find after you visit a link pasted under this video. 33. Make mason jars just a little more special. 34. Now those Polaroids are even more adorable than they already are. I really recommend washi tape for this project because the nature of it is it allows you tear away and re-stick should you make a mistake. Also, its paper quality allows you to add on captions with pen/pencils. 35. Use it to cover book spines. 36. Be really artsy with it. or Make it look like an art installation or gallery wall. 37. Make a ribbon for a winner. 38. Go to kitchen and wrap chopsticks with ‘em. 39. Make a car track in a kid’s room. 40. And then ask your kids to help you decorate your wall shelf. 41. Update your sunglasses. After your job done... 42. Wear it and spare time to make a really cute pencil holder like this. 43. Decorate an otherwise boring corkboard. or 44. Redo your kitchen. 45. Create a mural in a kid’s room. and if that’s not enough. 46. Decorate glass candle holders. or 47. Cover an embarrassing iPhone case. Or 48. Use it as temporary wallpaper. 49. Cover an otherwise boring box. 50. Or you it to decor a playhouse. 51. Decorate your fireplace mantle. 52. Or take them to make adorable candy wrappers. (These are actually soaps by Etsy seller Prunella.) 53. Decorate a door. 54. Or Use it to label and organize your jars. 55. Make gift, luggage, or key tags. Took a bunch of shipping tags you have and wrapped a little strip of washi tape at the bottom of each of them. And add them a ring. Last… 56. You could just use it as regular old tape. Washi tape storage is a whole other ballgame. Learn how to make this special washi tape storage box.... Or Learn to make this here at teal and lime.com With loads of cute washi tapes and paper tapes, it is easy to amass a collection quickly.

15 Cool Daybed With Trundle and Bookcase Designs

15 Cool Daybed With Trundle and Bookcase Designs - Now that we have a baby, we have all kinds of new literature,so to have a place to keep that, I want to make a bookcase to go right behind this chair. I'm gonna make this bookcase out of some nice oak veneered plywood. I found that part of a bed frame next to a dumpster in a townhouse complex. Having cut the pieces to width, I now need to cut them to length, and I'm employing a couple off tricks here. The first trick is to make a backwards scoring cut, so that way I avoid tear-out on the bottom in the veneer. And, the other trick I'm using is to put a board in front of the fence and that allows me to temporarily bypass the block that I'm using as a length stop. So, here's the shelves, and here's the sides of the shelves. and to cover-up this ugly edge, I'm gonna cut that from some trim that also came from this bed frame. Now I'll trim this trim flush with the surface using a flush trim bit on the router. I got the shelves and the sides, all trimmed. And, now I want to put these together. But, because these are already varnished, I figure the best way to go about this is to just put it together with a whole bunch of dowels, like this one. Now this does require drilling a whole bunch of holes into the ends of the shelves which can be difficult. What's useful is to use a doweling jig like this one and then drill through the holes. But, I'm gonna experiment with making a one-time use doweling jig out of this piece of hardwood. Well, so far this jig has worked out really well. But, the real test comes when I put this thing together. Hmm. Well, I should have dry-fitted that joint. Turns out my dowels were 1 millimeter too long, so I had to work really fast, no time to set-up the camera, With one side of the shelf glued-up, I now have to make all the boards with the holes here. So, I have to glue 28 dowels together all at once. So, I've got my clamps, and my mallet, and everything ready, and I'm gonna start by gluing all the dowels into here.


Oh boy. Daybed With Bookcase And Trundle Here we go, Oh, that was a very tense 8 minutes for me. But, the joints are all closed now. Tell you though, maybe just use pocket holes. It's so much easier. This is the bottom of the shelf, and my original intention was to have it sit on something like this, and then the base here. But, then I realized that if I inset that into a rabbet here, I won't have to hide the end-grain of this. And, I cut that rabbet with the pantorouter, just because it was the most convenient for me. I'm just nailing that on there, because it's on the bottom of the shelf and nobody's going to see it. And, here's the base for the shelf. The main purpose of the base is to get the shelf high enough so that it's up above the baseboard, so I can push it all the way against the walls. And, in the interest of getting it done quickly, I'm actually using pocket holes to attach the base. Yes, that's right. I'm using pocket holes. I'm sure I'll never hear the end of that. So, this jig has worked out quite well for drilling the holes and getting them all lined up. But, what I would do different next time is I would make it out of a piece of wood that's the same thickness as what I need to drill into, and that way to clamp it to the edge, I just need to screw another piece of plywood to the side of it. And, for on here I can just screw it on from the bottom, the same way. And, one thing that's worked out really well while making the jig, is to cut a thin slot along the line of the holes, because that helps to guide the point of the drill in this direction, which means I only need to worry about getting it just right in this direction.

Until now, Full Size Daybed With Trundle And Bookcase this triangular area under the stairs has just been wasted space. But today I am going to turn this spot under the stairs into a beautiful and useful recessed bookshelf. The first step for doing any project where you are recessing something into the wall is to find the studs. Trace out the stud pattern, and then you can use that framework to design the bookshelf. Basically what I am going to do is to create boxes that fit between the studs, Daybed With Bookcase and attach those to the studs with screws. Then I can put trim around the outside edge to hide those seams. The first step is to cut out the drywall for our boxes, and I will do that with a drywall saw like this one. So now we have our openings and can take measurements to draw up the plans for my boxes. I am making 3 boxes with adjustable shelving, which will get smaller as they go, to match my descending staircase. You can build your boxes out of plywood, and attach them together with screws or nails. Make sure to test fit as you go. You want a decently snug fit, but not too tight. You can always add some shims to make it fit better when you screw things together later. Now that the boxes are built, I can drill holes for the adjustable shelving. I have these shelf pins from Lowe's, and that shows me what size drill bit I need to use. Use a piece of pegboard as a guide to draw the holes for your shelf pins, and then drill only a quarter-inch into your side pieces. These boxes need some shelves. Measure your boxes and cut your shelves to the right size, and test fit with the shelf pins to make sure they fit correctly. Now is a good time to paint the boxes and shelves. I'm going to paint the sides of my bookshelf white, and the back panel to match the rest of the wall. The way you paint and decorate this bookshelf will really change the look of the room, so explore some paint and wallpaper options that fit your space. Put the boxes into place, make sure they are level, and attach them with screws into the studs. Finish it up by adding trim around the outside edges, and you are done!

I want to talk to you about how to create a warm, cosy, functional bedroom with a combination of lighting. So, let’s start with general lighting. A ceiling light provides us with a good general light so we can... find things... or, to get enough light while we’re cleaning. Besides good general light, we need task lighting, to help us perform specific activities... like reading. The light should be directed to give our eyes the best possible light. The adjustable heads also keep the light away from our partner. Another activity we do in the bedroom, is getting dressed. In this wardrobe, we‘ve used integrated task lighting, with LED lighting, so we can see our clothes, we can get dressed and not disturb other people in the room. By combining light above the mirror and lamps either side of it, you get an even light and are able to see yourself without any shadows. Finally, Full Daybed With Bookcase we have the last lights that will turn our bedroom into a homey, cosy and inviting room - mood lights. A cosy ambience helps us unwind after a hard day at work. Remember that ceiling lamp? The possibility to dim its light makes it work as a mood lamp too. So there you have it, when we combine lighting and different functions we create a bedroom that is a practical room and an inviting room for rest.

13 Top Wooden Bunk Bed with Desk and Drawers

13 Top Wooden Bunk Bed with Desk and Drawers - I want to build a queen size bed for a friend using my plans. And I picked up most of the lumber from the Home Depot with my car. Now the plans actually call for a lot of 2 by 4's and even 2 by 3's, but I actually bought mostly 2 by 10's, just because that way I got much better quality lumber. I'll start by making the side rails and I want to use some of the nicest looking lumber for that, because that's the most viable. And that side rail needs to be 7 inches wide. You heard that right, 7 inches. I'm actually using inches for this project. These big planer shavings sure fill up a dust collector fast. Now that I have the pieces planed, I can cut them to length. Now I need to glue on this rail, here and that will later support the slats. Now for the legs I need a whole bunch of pieces that are 2 1/2 inches wide. But, I'll cut these to a little bit wider from here so I can trim them down later. Now I'm gonna join the leg pieces together and here's my long piece and this goes here, and this goes here. These 2 boards are gonna form the headboard with the posts on either side, like here and like here. And I want to give this a bit of a nice profile, so I modified the CAD model and freed up the template for this, and I'm just gonna trace that through, by outlining those lines with a carpenter's pencil. And that will leave a mark on the wood. For the mirror image, I'm tracing my pattern through the back. I'm just using a strip of wood to smooth out between the place that I traced through. Now, I'm just gonna round-over the edges before I put the headboard together. So, here's my glued headboard legs and I could smooth the joints out with a hand plane, but I'll just do it on my jointer. Here is roughly what my headboard is gonna go together like this.


In my plans, Wooden Bunk Bed With Drawers I have this joined with dowels but, I'm gonna use some floating tenons, like these. They're sort of like really big festival domino’s. And that should be much better. I cut these from a strip of Oak and rounded the corners on my router table. And I've already joined the foot board with those so, now let's cut the joints for this one. I just worked up the spacing for the mortises and for each one of those I marked on which side the mortise goes so I don't cut on the wrong side. I'm gonna cut the slats on my slot mortiser which I haven't been using that much since I built the pantorouter. But, this machine does slot mortises really well. I just transferred all the mortise locations for the rails. Now I can also cut those on my slot mortiser. I'm gluing blocks of wood between the slats and that will keep them from sliding around. I'm cutting down the slats in thickness towards the ends, which will allow them to rest a bit lower on the frame. And it also makes up for any differences in thickness in the scrap wood that I'm using. Before gluing it together, I'm rounding over all the exposed edges. Well, that took some fast action with the clamps and some hard pounding to get that joint fully closed. I guess that's certainly a problem you could avoid, if you just used pocket holes. After that, I varnished all the pieces, but it was pretty boring so I didn't take video of that. Headboards are almost always pushed against the wall so I cut out this corner here, for a baseboard and cord around.

This rustic-looking desk works hard with sawhorse shelves, a center drawer and a roomy top. It's expertly crafted from thick planks of meticulously hand-distressed pine that have a salvage style with groove and saw marks and a rich depth of color. Rugged metal trim detailing helps complete the rustic, industrial look. The sawhorse legs feature a shelf for extra storage. Pair with our mini and medium bins, which are sold separately, for hidden storage. Solid Wood Bunk Bed With Drawers Our co-coordinating Emerson hutch is two-tiered with one large open cubby on top to add extra storage space while also maximizing your desktop surface. The English Dovetail drawer opens smoothly on metal glides and features drawer stops for safety. The desk and hutch are crafted with kiln-dried wood frames and finished by hand in our Rustic Hazelnut Finish, using an exclusive multi-step process that creates exceptional depth of color while highlighting the wood's natural grain. Most importantly, our Emerson Sawhorse Desk and Hutch are rigorously tested to meet or exceed the highest industry safety standards.

White Wooden Bunk Bed With Storage Today we’re going to be taking a look at some of the production of a Cedar Lake Flat Top Spindle Log Bed. We’re going to skip the hand peeling portion of the building process and move right into the actual construction of the bed. Here we see Tom as he is setting up the flat top of the bed. He’s going to be drilling out the mortises for the tenons of the spindles. After the first hole is drilled it is then checked for accuracy to make sure the depth and everything is correct. Here we can see the drill getting adjusted so that the correct depth is established for the drilling. Multiple measurements are taken throughout the whole processto ensure that everything is accurate for easy assembly. The tops are drilled. Let’s move over to the legs. We’re going to speed this portion up. The legs are hand peeled and then they’re all gone over with a palm sander to make sure that all of the rough spots or anything that may snag is smoothed out and cleaned up. Once the palm sanding is done, it’s gone over by hand, touching each portion of the log to make sure that it is totally smooth and ready for the next step of production. Here are the finished legs. You can see how there’s still a lot of character in the logs but they’re much smoother. No sharp edges where the branches used to be. The last step in the production process is drilling the holes in the legs for the side rails and for the horizontal logs of the headboard and footboard. Each hole is carefully drilled and then checked and double checked to make sure that it was drilled correctly and evenly. Now we move back to the flat tops that were drilled and the spindles are then inserted. We’ll go ahead and speed this part of the video up as all that is being done is the spindles are being inserted. Then you can see Tom as he lines them up so the most unique characteristics will be on the outside of the bed. Once all the spindles are in, then the bottom horizontal rail is attached. It has to be lined up on each spindle and then it will be tapped down and secured. As you can see, this is a time consuming, and I wouldn’t say exactly fun, job of lining all the little pegs up and pounding them in. You can rest assured that this will be done for you when you receive the bed. All the headboards and footboards are fully assembled. So the log is on, the last few taps will be made. Everything will be double checked, measured to make sure that everything is exactly the way it should be for the next step.

The next step is attaching the legs to the headboard and footboard. The first leg goes on pretty smoothly. Putting the opposite side leg on is always a little more difficult. Everything was lined up perfect on the opposite end. That usually throws the second end out of whack so great care is taken in getting everything lined up so the leg sits flush with the flat top of the bed. You can see Tom here works on it quite a bit just to get it perfect. Wood Bunk Bed With Desk And Drawers The legs will come attached to the headboards and footboards so you won’t have to worry about assembling it yourself. Once the legs are attached, the headboards and footboards are then carried over and as you’ll see in the next step the bed will be dry assembled to ensure that everything was made correctly. For dry assembly the side rails are attached to the headboard and footboard. Measurements are then taken between the side rails to determine the exact size of the support rails for the mattress and box springs. After those parts are cut, and the bed is totally assembled, it will then be unassembled and go in for finishing. Once all four coats of finish are applied it is then packaged up, palletized and shipped out. I hope you enjoyed this behind the scenes look at the making of our Cedar Lake Flat Top Spindle Log Bed.

10 Wooden Triple Bunk Beds for Adults Designs

10 Wooden Triple Bunk Beds for Adults Designs - The hardware for our bed is sourced from the big box store. Nothing fancy but I do have carriage bolts, washers and some threaded rod. We're going to make some modifications to this hardware to make it more appropriate for our application. First we're going to paint the carriage bolt heads matte black. A quick file. A little sanding. And some paint is all it takes to transform the bolt heads into something that doesn't look awful. Next we need to flatten out one end of our washers using the grinder. This will make for a better fit in the flat bottomed nut access holes and since so many of you got a kick out of this last time will say it once again, nut access holes. To give the washer a curved profileI am using a small press that I made from scrap wood.Finally the threaded rod needs to be cut to size using a hack saw. The center support rail is held by a modified French. This is made from few pieces of scrap with the center piece receiving a slight angled cut. The center rail itself will receive a series of notches to accept the cross supports. The notches are made at the table saw using a quick jig that resembles a box joint jig. When it's all said and done it should look something like this. It's pretty cool. The ends of the rail receive a notch and the French cleat angle is chiseled by hand for a perfect fit. Beauty. The brackets are then glued and screwed to the foot board and head board.Alright let's see how this works. It should be a snug fit. The key is to get both sides in at the same time. There we go. I like it. For the maple support slats, I'm cutting notches that will meet perfectly with the center support notches. The maple pieces simply drop in place resting on the center support and the side rails. And speaking of rest, I was ready for a nice nap by this point. For additional support I'm making two block feet that will sit under the center rail as you see here. With all of the wood working done, the only thing left to do is scrape and sand. For the customer requested oil finish, the wood is sanded all the way to 320 grit.


The finish will be pure tongue oil diluted 50% with mineral spirits and heated with a double boiler hot plate setup. I'm not a huge fan of pure oil finishes but this is what the customer wants. Wooden Triple Bunk Beds With Mattresses The finish is applied with a brush and then wiped back clean with a cloth. For the rest of the day I will come back and check on the piece and wipe back any standing oil. Now it's time for assembly. The threaded rod is screwed in to the foot board and the rails are dropped in and bolted down. The rails are then pushed forward into the headboard mortices and secured with the hardware. Now for the center rail, the support feet and the slats. And here it is- beautiful, solid, bubinga with a wenge raised panel. I hope you enjoy the free version of this build. If you would like to see the full version, which clocks in at about 6 and a half hours of high quality video instruction.

I'm going to take you on a tour in this small apartment. It's eleven square meters. The parents have their loft bed in the middle of the living room. Using the entire height of the room. A bit unusual for a living room but here it works perfectly. If they want more privacy they just close this curtain. Over here, this is the place where everything is stored and organized. The parents have their cabinets up to the ceiling and the kids have a lot of space underneath for playing. They have this fantastic piece of furniture. Big drawers for all of their toys. Easy to clean up - take them out put them in and close it again. And if you leave out these drawers, Wooden Triple Sleeper Bunk Beds you get a desk. You can have two extra chairs underneath. It turns into a desk. Here we have some stackable stools on the side. Which you can take out and use as your coffee table or even as a footstool. Put up your feet as well. The kids can sit on this one. Now, underneath here you have space to personalise your room. You have these display shelves all the way around. These cushions are easy to change, you just swap the cover with a new pattern;. And we put this canvas underneath here to cover the bottom of the bed.Smart!

Which includes full plans on how to make a picnic table, Wooden Triple Bunk Beds For Adults
 along with 16,000 other project plans. Woodworking Projects For Picnic Tables Anyone who has a passion for working with wood knows that the projects can sometimes be nearly impossible to complete. Woodworking projects for picnic tables can be especially difficult. There's just something about the need to make it beautiful while still sturdy enough to withstand all the stuff picnic tables get used for. If you've tried, and found the process more frustrating than relaxing, then I have a solution for you. Most woodworking magazines and plans are flawed. Yeah, I know, it doesn't seem right, does it? Well it's true. In some cases it's merely that they are expecting a higher level of understanding than most people have. In those instances, the plans usually skip steps. Sometimes the plans are downright wrong. Measurements are off, or the diagrams are wrong. Even the diagrams that are right can be horribly confusing or unclear. When doing something that requires precise measurements and knowing exactly where to cut, this can be disastrous. Ted's Woodworking Package is a set of a book and a DVD that offers complete, correct plans for just about any project you can think of. Over sixteen thousand step by step plans are available at your fingertips.

There is everything from bunk beds to dressers, Cheap Wooden Triple Bunk Beds tables and chairs to beautiful outdoor furniture. Picnic tables are, of course, among the list as they are fairly simple to create while still being useful. Created by a man who started from scratch, just like you, and has had enough of flawed plans, it is a perfect companion for anyone who loves to work with wood. It was designed to be as user-friendly as possible, and has some amazing features toward that end. The diagrams are full color and easy to understand. There is a material list and blueprint for every project, and the whole thing was specifically created to get the project done as quickly and inexpensively as possible. The plans are organized and easy to search through, and the second part of the kit offers pictures and explanations of all the tools that may be required. So if you are one of the many people who are fed up with woodworking projects for picnic tables being impossible to understand, get this package. It has wonderful reviews, easy to follow diagrams and step by step instructions. It offers unique features like the organized files and complete list and explanations of woodworking tools. Perhaps best of all, this program will help teach you how to take what you learn with it and create your own wooden works of art.

Rabu, 10 Februari 2016

Most Elegant Wooden Bunk Bed with Desk Designs

Most Elegant Wooden Bunk Bed with Desk Designs - This is the 21-16 convertible bunk bed it's the all solid wood all discovery sparked that meet the ASTM standards set forth by the Consumer Product Safety Commission safety czar the first priority for discovery always is extremely thick or else intercourse IKr else on the top and the bottom all connections or metal to metal bolt a metal quarter inch ball into a metal quarter inch not and a down the center helpfully alignment and increase shrank anyway you see the ball to find a dal but that doesn't stop reports from twisting saw all them the beds are made forfeit and finish the finish is a a a lacquered finish in nationalist lacquer finish butter send it to 220 grit all the edges a smooth all the corners are rounded I'll the metal the slats on the bed I made a mental top and bottom as you can see the pair has a built in three drawer system and a triangle the drawers are all solid wood the complete three drawer system is assembled it just simply slides and let me see if I can point out here yes you could it's a one complete unit that you just lie there on the track left and right push it in and it's ready to rock and roll.


Wooden Bunk Bed And Desk Three drawer and then there's also a trillion underneath the bed cell on this particular bed you love it when they're on top but went on a bottom and what went wrong doing it there are three different sleeping surface is in the same square footage of a twin size bed to solid wood panel we don't skimp anywhere on these bonkers when it comes to the solid wood everything salwar through and through the beds available to finish is he saw the hiney this is a merlot finish it's also available as a twin over four bed with a fork stanchion kid sees a simply add the full extension kit by the 20 before slacks and converted in from the twenty20 into which one over full we also have the stabilizing arches stop the bed from shaking this is also shows you that the bed come with six drawers purses the three jurors in the trial will last you know I showed you the file conversion of the bed is you can do it as a twin over desk law system Sri only popular for people with limited space on dorm rooms wherever the bed is built for teenagers no problem its rated the whole 400 pounds in the top dead desk unit has a pull-out train to fully functioning solid wood drawers again the entire followed word finishes is the same lacquered finish the senate's the same to 220 grit all the edges smooth the corners are rounded transition is important on a bed like this typically the transition between the top and the bottom that is very short made the schools we possibly could and to keep and keep the shrink the bed is extremely solid doesn't shake got sixty-three more by 63 mil mylar post like I said we'll think where else the latter is built to last them.

Wood Bunk Bed With Desk This is the PBteen Stuff-Your-Stuff Classic Bed System. Get everything you need for a bedroom that maximizes storage, organization, style and comfort, all in one set. It's crafted with a kiln-dried wood frame. The slat-roll foundation is designed for use without a box-spring. Built-in cubbies store books, speakers, bins and more. Use with our under-bed bins for extra storage beneath the bed. The bins are sold separately. The Classic Bed System includes one platform bed, our super storage headboard, two towers, two suspension shelves and one desk. The towers have adjustable shelves and cut-outs to easily accommodate cords. The desk features one drawer and one pull-out ledge for additional work space. The bed is finished by hand in one of our exclusive finishes for exceptional richness, durability and depth of color. It's available in our PBteen Classic White, Honey and Espresso, in twin, full and queen sizes. Most importantly, our Stuff-Your-Stuff Classic Bed System is rigorously tested to meet or exceed the highest industry safety standards.

What kid wouldn’t love to call this cool loftbed their own? Wood Bunk Bed With Desk Underneath Make it happen with our easy to follow project plans. start by assembling the headboard…join the side panel the one with the circle cutout - and the two legs, using glue and screws. Then add the headboard cap. The footboard is assembled the same way, join the sidepanel to the two legs, and add the cap. next, join the headboard and footboard using the rails that form the sides of the bed. Make sure you DON’T glue these, just attach with screws so you can disassemble later to apply the finish. With those in place, add the cleats that will support the slats for the mattress. And then add the slats themselves. Next, the stairs. Cut the stringers or sides and glue and screw first the vertical pieces, then the tops, and the back panel. The handrail is added last, but don’t glue this so it can be removed to make painting the stairs easier. While you have access to the underside of the stairs, reinforce them by driving screws through the vertical stair pieces into the treads. Slide the stairs into position to check for fit…then disassemble the loft so you can apply the finish of your choice – it also makes it a lot easier to transport into a room when it’s in pieces. reassemble the loft and let your kids loose. You just scored some serious parent points.

Today we are going to take a look at the Rustic Lakeland Twin over Full Bunk Bed. This bunk bed features a full log construction. As you can see, Wooden Bunk Beds With Built In Desk Mortise and Tenon construction is used. The Tenons are nice and big, making the bed very strong, very sturdy. It will hold up easily to children, to adults. You can put this in your rental cabin, your hunting cabin, just about anywhere. It is definitely strong enough for just about anybody. The bunk bed features a built in ladder. This is a space saving feature and the ladder is located on both the headboard and the footboard. I'm going to climb up the ladder now and let's take a look at the top bunk here. We are using an eight inch mattress in this top bunk. As you can see there is plenty of room above the mattress for the safety rails so you won’t have to worry about your small children rolling out of bed. Let’s head underneath the bed, take a look to see what supports the mattress and the Bunkie boards. As you can see we have four complete log that support the Bunkie boards and the mattress. The logs are much stronger just slats of wood and it will support a lot of weight. We have people who ask us if the checking found in the logs is anything to worry about. As you can see here this log has a descent sized check, I’d say medium sized, they can get a little bit larger, and they can definitely be smaller. This is part of the side rail on the side of the bed. What we are going to do is we are going to stand on top of this log and jump up and down. As you can see, nothing broke, didn’t even crack. That is the great thing about Northern White Cedar and about products made in America. They are built to last, very strong, very sturdy. This bunk bed is available on our website @ www.logfurnitureplace.com. We also have a Twin over Twin, Full over Full, and Twin over Futon available. Custom sizes are also available.

10 Wooden Bunk Beds with Storage Designs

10 Wooden Bunk Beds with Storage Designs - How to Build a Bunk Bed. Bunk beds are a practical solution when space is at a premium. Here's how to put one together on your own. You will need Tape measure Miter saw 4 4 X 4 in. posts, 6 ft. long 2 2 X 6 in. boards, 7 ft. long 2 2 X 6 in. boards, 4 ft. long 2 X 4 in. plywood bits 2 X 6 in. plywood bits Screws Hammer No. 10 finishing nails Carriage bolts Drill 4 bolts 2 1/2-inch plywood pieces, 39 X 75 in. and sandpaper. Step 1. Use the tape measure to measure the size of your mattress. Twin mattresses are typically 6 1/2 feet long and 3 1/2 feet wide, but it's best to get an exact measurement to determine the size you'll need. Step 2. Use a miter saw to cut the wood, using the mattress measurements as a guide. Build two rectangular boxes, joined together with screws. Screw 2-by-6 inch plywood at the ends to make disassembling easier. Measure carefully and always double-check your work. Step 3. Assemble mattress supports inside the box using four plywood bits. Place one support 3 inches from the foot and one 3 inches from the head of the frame and fasten with screws. Install additional supports to the sides and in the middle. Step 4. you want each corner to join the posts. The lower bunk should be at least one foot above floor level and the upper one should be four feet above floor level. Position the posts at each corner and attach the frames to the posts with no. 10 finishing nails to attach frames to posts. Then check to be sure it's square before attaching with carriage bolts. Step 5. Use the thick pieces of plywood for mattress supports. Measure and cut each piece to fit into the bed frame, sanding the sides to eliminate sharp edges. Step 6. Refer to your plans for hole placement. Measure the spots on each post and use the drill to bore holes. Insert a bolt into each of the four holes and carefully join the top bunk to the bottom one. Step 7. Use the remaining piece of wood to construct a safety rail and secure it to the upper bunk. Follow your blueprint to build a ladder, screwing together all joints. Attach it to the frame per the instructions. Did you know Egyptian King Tutankhamen's funeral bed was made of ebony and gold.


Today we're in my house, Bunk Beds With Storage Underneath where I live with my 3 kids and my wife, and uh, none of this work I've actually did myself, but we're going to show a couple things that I did do. Mostly for the kids. This is definitely one of the earlier creations that I made, back when I was 17 or 18 years old...I made this pencil case. It's made out of teak wood, and some plastic shelves that the pencils can be held in. Since the kids came along, they've made it their own and kind of done a little extra colouring on the top and Technically this is not in the house, it's just something that I just built so that the kids could all make water balloons at the same time. It's basically 6 faucets that are all connected to the same hose. And we've also got these little contraptions on here, that help the kids tie the knots themselves. And then you have a water balloon. That was a pretty good shot. Ohhh Excellent. I built this desk for my kids to draw on. It's got a light up top and a light down below so they can put their favourite drawings, and put a piece of paper on top and trace them.That's awesome. I'm going crazy. You're going crazy, Yeah. This is a set of shelves that I threw together for my boys with some old railroad ties that I found at a railroad behind our old house and a piece of driftwood. But the coolest thing has gotta be the surf shack. This is the beds that I built for my 2 boys. It's basically made out of a lot of recycled material that I found. Some decking that I had left over from my deck, some wood that I found down by the beach, some water reed that you can see pretty much anywhere, it grows along the highway. It took about 2 months, working evenings between 11 and 1 o'clock in the morning. You can see it has a lot of extra features. This is a doorbell that I added into the surf shack for the kids. I usually take the battery out because otherwise they'll wake each other up all the time but, uh, they seem to enjoy that. So this piece here is a coconut telephone that I built so that the 2 boys could talk to each other. There is a PVC pipe that runs out the back up to the top and that way they can chat with each other. Hello,anyone up there? Halllooo. This is the coolest thing in the house. Whoa! You got me good. You can see the definition of "cool" changes when you become a dad.

All the different ways that you can adjust the height of your bed, and also how to loft and bunk it, as well. This is what the room is going to look like when you first check in. Hi, I'm Jeanette, and we're going to show you two practical heights you can adjust your bed to. There are ten different levels on your bed frame. Right now, the bed is at level six. As you can see, Wood Bunk Beds With Storage you can still store things below it at this height. We'll now show you how to raise the bed to its highest possible height. This is called a captain's bed. The first step is to remove the mattress. Now that the mattress is removed, you have to remove the metal frame of the bed. You have have at least one foot on the bottom as you pull up. You will hear it unsnap. Once you've unsnapped all four of the corners, you and your roommate are going to have to each put in a side at the tallest position. It's really nice to have the end against something hard. So in this case, our wardrobe, and lift it up towards the middle to end so it's flat. And you have to put the hooks right into the top, and push it in. And now once it's in, you snap it down. And snap it in. Your bed has now been officially captained. When the bed is captained, the space from the floor to the top of underneath the bed is 30.5 inches. Now we're going to show you how to loft your bed, and so what the first step to do is to put your bed on its side completely with the mattress off. That way you can put the lofting kit ends comfortably on it. Jeanette is going to show you how to do that. The lofting kit consists of two sets of bed legs, and each set of bed legs will have two pegs. Insert the pegs into the holes of the bed frame. Then slide them together.

Once they're locked in place, Bunk Beds With Storage And Trundle you're ready to stand the bed up. Now we're going to show you different ways that you can put your desk underneath the loft. When your bed is lofted, it's so tall that you can fit your other furniture below it, like your desk, and your dresser. Another option when you loft your bed is to put the other bed in an L-shape perpendicular to the loft. To bunk your beds, place both beds without mattresses on their side. Obtain the four metal pegs from your cluster office needed to bunk the beds. Slide the metal pegs into the holes on the bottom. And that is how you bunk your beds. We've now shown you four distinct ways to adjust your bed. You've seen it at mid-height, captain's position, loft, and bunk bed. All of these four distinct choices help to maximize the space in your room. If we can do it, so can you. From all of us at Residential Life Student Services, have a great semester.

New Collection of Bedding for Daybeds with Trundle | Pictures | Ideas

New Collection of Bedding for Daybeds with Trundle | Pictures | Ideas - Today, we're going to be doing a new and improved room tour. I'm so excited. We're finally going to show you guys our new room in Texas. And we just decided to change the look. No more polka dots. We wanted more of like a mature Teenager Room. So my mom helped us design it. And I can't wait to show you. So Let's get started. So first, we'll show you our bathroom. We're super excited, again, to have a bathroom connected to our bedroom. Because we didn't have that. And we had to share with all the other girls. So it's nice to have our own bathroom. See in there? Nice, clean bathroom. Oh! Beautiful! Enough space for two. Yup. This is our jewelry screen. And we actually have all our jewelry. This is An old antique Doorframe. Like, screen door. Screen door. And then, we just made hooks to hook onto our jewelry. And yeah, then it just holds our earrings and our bracelets. And It's really helpful. Our necklaces. It's really helpful and super cute. So that's our bathroom. And we'll move on to the bedroom. So next, we will show you guys our beds. But first, we'll start with our old antique chest. Ta-da! My parents got it while antiquing In Missouri I think, because they were going around antiquing. Yeah, but basically, just holds all of our blankets. And then behind it, we have a secret bookshelf down here. It protects all of our books. It's where we keep all of our favorite books, you know, make our room look more organized and saves space, so, oh, it's a bookshelf and so we're good. I like that book! It makes our room look clean, and it's just perfect. Yeah. So next, we'll show you our beds. These are our beds, and the bedding and all the pillows are from Pottery Barn. And we made this arrangement, because in our old room, we had two beds that were you know, they were sideways, side by side.


They took up the entire bedroom. We felt like we didn't have enough space. So we figured out this L-shaped I don't know what you would call it, Daybed With Trundle Comforter Sets but it works. It's just these two flat beds, and we put mattresses on it and put them into an L-shape. And so Brooklyn lays this way. And I lay This way. And our heads are together. Yeah. Because none of us want The feet! Our faces. You know. No. So this is our arrangement for beds. And as I said before, the bedding, the pillows, everything is from Pottery Barn. And it's just a gray cream, white, gold mixture. Color's so cute! And down here, we just have these little black they're like bucket sort of material, buckets. And they hold a bunch of stuff, just whatever you want to put down there. Hang on, give me a second. Store-it beds? Something like that, where they have the cubby holes underneath, and then the mattress on top. Yeah. So that's the kind of bed that we have. And it's really helpful. So it makes the room look clean and organized. And you just have these cute little cubbies and boxes to hold all of your stuff. So we'll move on to our board of pictures. Well, this kind of like our magnetic bulletin board. We just hang up pictures of all of our friends and family up here. And over here is my little Trim-a-Rim circle. And it's a white board I like to write quotes on it and it has a little rim where you can create whatever you want, put whatever you want on it, like pictures, slides. So I just put that up there because I thought it went well. And these little lights around it just are left over lights from our seventh grade vice president and president campaign. And so we just hung them up because we've got to give it more of a teenager twist. This is what we like to call our Pixar lamp. And for those of you who don't know what that is, it's a lamp that goes like this. It's like You know? And then it's like The "i" of the Pixar. So this is our Pixar lamp. It's from Target. You all want a Pixar lamp, I know you do!

We're going to turn towards this little guy over here. This is This is my favorite part about our bedroom, honestly. I have to be honest. This is our reindeer. It's not It's a deer. It's a deer. But it's like I don't know. But we're trying it out. And I love it. We've seen this in magazines and stuff. And in Areopostale. Like unicorns. I like unicorns a lot, Bedding For Trundle Beds unicorns. But we liked the deer better. So we got the deer. And it just matches the whole theme. And ah, it's my favorite! I think it just spices everything up, makes it cute and Super cute. OK. And then, we have our black B, which I think we had in our old bedroom. Yeah, we did. Because we made it a couple years ago. Stands for? Brooklyn. And Bailey. We need double B's for that. We do need double B's. We should get double B's. We should make a pink one for me. Next, we have our Yankee Candle, and it's Macintosh, like the apple or like the computer brand, whatever you like to prefer. And that will just keep things centered, mm! Smells so good. Like fresh apples. Just don't forget to blow out your candle. Yeah. That wouldn't be good. Yeah. So safety with candles in your bedroom. Yes. Next, our night stand, we've had this one for a couple years. And it's another antique. Our parents are Antiquers. I guess you could say. I don't really know what it's called. Antiquees? They're antique shoppers. Antiquings? I think they got it from Missouri again. Missouri has the best antique stores. Yes, it does. So if you're in Missouri, go antinquing. And then, we have our iHome down here. I don't know if you can see it, but i Homes are i Homes. Nothing more you can say about it.

This is our couch. And he got it from Pottery Barn. Pottery Barn. My goodness, no. Pottery Barn. And I love it so much. Bedding For Daybeds With Trundle  It's so soft. It just kind of brings in the grayness It brings together the whole room. Yeah, it does. And the carpet, if you can see it, it's from Target. And again, it's just added into the creams and the grays And the golds. And it kind of just Brings it all together. Yeah, again. And then, we have these amazing frames on our walls. The frames are just, again, from antique stores. And then, the wordings, like the words painted on them, are from Hobby Lobby. And they have stick-on things, so you can stick them on the wall. Yeah. So basically, we just hung up some frames and words in the middle. And oh, it's so cute. So cute! This is our closet. I'll open the door. It's like half the size of our Utah closet. Dear. It's really, really sad. But then again, we got lucky because it's a nice walk-in closet, and we have enough room to store all of our clothes. We have a bajillion little cubbies in there to store everything. And it looks pretty good. I would say! It's usually not this clean. But we try. Yeah, we do. This is our grand mirror, and we got it from Hobby Lobby. And I must say, it weighs A ton. Thanks, Dad! My Dad can attest to that because he hung it up. He hung it up for us. So thank you, Dad, for hanging that up. But it's awesome because it's full length. And you'll love having it in here. Look at your outfits in the morning. And you can pose in front. Like, snap! Snap! Snap! Mm-hm, snap! Thank you guys so, so much for watching our new and improved room tour. Be sure to leave a comment below on what your favorite part of our room was.

22 Contemporary Modern Daybed Bedding Sets Collections

22 Contemporary Modern Daybed Bedding Sets Collections - Contemporary bedroom furniture sets at Home Lliving Style carries traditional as well as modern bedroom furniture sets that will complement your needs. With our contemporary bedroom furniture you will and beauty and elegance to your bedroom Plus our skillfully prepared furniture is functional and easy to handle. Our customers have appreciated the quality of our products and so will you See what people are saying about us: I had a wonderful shopping experience online with your company I look for the Victorian mirror I wish for found it,bought it, and gave to my daughter as a wedding present How perfect is that, Thank you. And daily she proudly displays the in her house and when I go visit, I smile. thanks again." Debbie Weitzberg, Canoga Park CA Testimonials: "I love shopping with you and your website is so easy to use you always have items I don't see anyplace else Georgia Walker, Round Lake Testimonials: "so far I have ordered a Flokati rug, a dining table and eight chairs and everything has been excellent the quality is great in the customer service has been excellent i'ma new fan of removing and plan to recommend it to my friends and colleagues Kelly Chamberlain San Francisco California home living style is the furniture sanctuary where you'll find a unique collection of contemporary bedroom furniture so browse our collection today and buy the most modern bedroom furniture for your home so many reasons to shop at home living style 12 years online, relax knowing you are shopping with a reliable company enjoy free shipping on every order no matter how small or large use Pay Pal Bill Me Later and enjoy interest-free financing for six-month click for them shop now button to the bedroom furniture set you've always been looking for!


Contemporary Daybed Bedding For summer we're proud to introduce the Olivia Crib, and it's part of our Olivia Collection that we introduced for spring that included a bed, and a dresser. So now we have a crib for the newborn baby. The inspiration is based on a Baroque style, the changing table that goes with this collection is actually the dresser, with a topper that we now are offer and we now have an extra wide dresser as well. The Dessa finish is a multi-step finish that comes in white and pink, the same as the bed, and there are some beautiful details on this crib that you should really take a look at. There's beautiful moldings, curved end panels that really unique in the market, it also has turned feet that make it very delicate and beautiful and add to the Baroque style. Something else important that you should know is that due to the curved end panels we're providing a mattress to make sure that it fits snugly. but it does fit our normal fitted sheets. pottery barn kids,  You can build this bed yourself with some simple tools and a little time. Wanna see what's at the 'core' of this daybed project? Hollow-core doors! They're an inexpensive, versatile material to use so let's step through the build. The daybed is basically two doors that 'sandwich' some dividers creating these great little storage cubbies. Check out the detailed directions first, then get started by applying the edging pieces to the doors - make sure that the edging is flush with one face of the door - then glue and nail those in place. Put one of the doors on your work surface with the side that isn't flush - the 'offset' side - facing up. Bring in one of the end-boards and mark this point right here - where you'll need to remove a little material in order for the endboard to sit over the edging and fit flush to the door.

Use a jigsaw to remove that little notch and glue and clamp each end board in position  it should be perfectly flush with the back of the edging....then flip the door -and drill pilot holes and drive the screws to secure the end boards. Contemporary Bedding Sets Queen Now - flip the door again, so you can measure and cut the backboard to fit. It's good to have a buddy for this project because you do flip this assembly a few times. Align the backboard along the offset edging. Measure and mark to make sure the backboard is evenly aligned at both ends, then draw a center line down each end piece like this - it's the perfect guide for driving the screws to attach the end pieces to the backboard. Now we're going to measure and mark for the placement of the dividers You'll make sets of marks for each of the three dividers- on the top of the back piece, one on the face of the back piece, and at the front edge of the door. Use these marks to align each piece properly. Now you can glue, clamp, and screw each divider in place. This mark on the backside is the center point of each divider, use it as a guide for driving your screws. Once the glue drys - flip the door so you can drive screws at the front edge. Transfer your marks up so you know where the dividers are - drill pilot holes, then drive your screws. This is the opportunity to secure the door to the back piece too. Now, flip the assembly again. I'm gonna slide the second door in place, and attach our casters. The glue's doing most of the work here, so don't be stingy with it, put the block in place, then drill pilot holes and drive screws to attach the casters to the blocks. Now that it's time to paint, you can slide the bottom off which will make it a lot easier to paint the inside. With everything painted, attach the bottom to the rest of the assembly using glue? and screws and the daybed's done. We attached another hollow-core door to the wall to act as a headboard. Pick your favorite bedding, tuck the daybed in, and then tuck yourself in for a well deserved rest.

The 16 Best Kebo Futon Sofa Bed Multiple Colors 2015

The 16 Best Kebo Futon Sofa Bed Multiple Colors 2015 - If you’re short on space, a futon is both an affordable and functional option. In addition to having a great place to watch TV, you’ll also have a comfortable bed for yourself or overnight guests. However, it can be difficult to find a local store with a large selection of good, quality futons to choose from. That’s why many people have turned to the internet to buy their futon. With online stores, you can pick and choose from a huge selection of frames, mattresses, and covers, and get top quality futons at very affordable prices. Top Consumer Reviews.com has reviewed and ranked the best futon companies out there today. We hope our free reviews help lead you to your next futon! we will show you how to build a French Mattress Style Cushion. This is one of the easiest types of cushions to sew, it does not have a zipper or Velcro opening, but is simply sewn shut. The mattress style seams give it a great look without the work of installing a piping. Let’s get started as we show you every step in how to make your own using supplies from Sailrite. To get started we first need to do some patterning on our decorative fabric. Cushions have a top and bottom plate and boxing on the sides. Two guidelines for patterning will be shown in this video. The first is for a cushion filled with Fiberfill. A little later on we will give guidelines for patterning for a cushion filled with a sheet of foam. First let’s discuss the requirements for a French Mattress Style Cushion filled with fiber. Determine the size of the cushion you want and the thickness. The cut top and bottom plate needs to be 1 ¾” larger than the desired finished size of your cushion. See our example in yellow here. Angela is marking the fabric to size here with a soapstone pencil and a straight edge ruler. We are using a Sunbrella Upholstery or Furniture Fabric which is the world’s best outdoor fabric. Why? That will be discussed


Kebo Futon Sofa Bed Multiple Colors Walmart When marking the along the width of this fabric the location of the stripes must be taken into consideration for the second plate panel. Here is where the first plate started and that’s also the location where we want the second plate to start. Here along the same line, so the repeat is the same between top plate and bottom plate. If you have done it correctly the end point of this second plate should fall on the same strip as the end point of the first plate we made. Next we need to mark for the boxing in both width and length. To calculate the width of the boxing we need to add 1 ¾ inch to the desired finished width of boxing that you want. This extra amount will account for the mattress style seams. For our cushion we want it to finish at about 5 1/2 inches in thickness. So we will add 1 ¾ inch to that figure making our cut width 7 ¼ inches. We also want the stripes to line up so we will position the boxing right above the two plates we just traced out on the fabric. The length of the boxing should match the plate’s length on each side. Our cushion is a square so all 4 sides are the same length. Obviously the boxing on the side of the cushion will not line up with the top and bottom plate stripes. We are cutting our Sunbrella fabric out with the Sailrite Edge Hot Knife. This seals the edge of the synthetic fabric preventing the unraveling of the fabric. We are cutting on top of a metal ruler to prevent damage to the table top below the hot knife. Our two plates and 4 boxing strips are now cut to size and ready for sewing. We have now covered patterning for a cushion filled with fiberfill let’s move on and touch on how to pattern for a French Mattress style cushion filled with a sheet of foam. To cut plates for this simply add ¾ inch on all sides. To cut the boxing to width use the foam thickness and add 1 inch then add between ¼” to ¾” for seam allowance. This will result in a cover that compresses the foam slightly making it look great! The length of the boxing should equal the sides of the plates.

If you’re making a cushion using a sheet of foam skip this chapter. Since this cushion will be filled with a Polyester Fiberfill we want to make a pillow insert which will house the fiberfill. To make this we will use Spun Bonded Pillow Protector fabric. This fabric is inexpensive, breathable, water repellent and soft. Fold the Spun Bonded fabric in half then fold it over one more time to a width slightly larger than the width of the boxing. Then trace around a plate and a boxing strip. As you can see we will get two plates and 4 boxing strips all at once when we cut it out. Kebo Futon Sofa Bed Multiple Colors Color Black These plates and boxing strips for the pillow insert to do not need to be extremely accurate in size, since they just used to house the fiberfill. No reason to use a hot knife on this Spun Bonded fabric as it does not unravel. We now have all the plates and boxing strips cut for our cushion in both the decorative fabric and the Spun Bonded Pillow Protector Fabric. It is always a good idea to lay the fabric panels out in an organized fashion before sewing. This reduces the chance of mistakes experientially. No matter if you are making a cushion filled with fiberfill, as we are, or a sheet of foam the construction is the same for both. Strat with the boxing and lay the corresponding boxing strip onto of the opposite leg so outside surfaces are facing each other. Then sew the two strips together along the short end with a straight stitch about 3/8 inch inside the raw edges of the fabric. Be sure to do some reverse stitching at the beginning and end of your stitch to lock the stitch in place. Take the assembly over to the where the panels are laid out and grab the corresponding boxing strip and repeat the process. Always go back to the panels as they lay on the table and check to be sure strips are running the correct direction and also that they will line up to the plates, along the two sides that is, as it is impossible for them to line up along the other two sides. Once all 4 boxing strips are sewn together, it is time to join them together to form a complete chain. Be sure the outside surfaces are facing each other and sew along the end that completes the chain. We will not show sewing that.

Kebo Futon Sofa Bed Multiple Colors Now take the boxing assembly over and line it up with one of the plates so the strips are all even. Flip the boxing over so outside surfaces are facing each other and the edges are even. We will start sewing near the center position on this side. We will use a straight stitch set at about 6mm in length and sew about 3/8” from the edge of the fabric. Be sure to line up the strips and the edge carefully as you sew. Notice that when Angela gets to a corner she will bury her needle to the thickest part of the shaft and the lift the presser foot rotate the fabric on the corner and then lower the foot and continue to sew down the next leg. Because this side does not have stripes that match the plate we can’t use them line up the boxing to the plate. So, she will ensure that the opposite corner will line up with the plate’s corner. This is not extremely critical for small cushions, but for larger cushions this is a very important step in keeping the boxing and plate’s edge length the same while sewing. Continue sewing around all sides until you reach your starting stitch and do some reversing there. We will not be showing that. Now that the boxing is joined to one plate we simply need to sew that assembly to the last plate. To do this line up the plate so the strips will match on the two sides they matched for the other plate. Be sure outside surfaces are facing each other. It is easier to sew this assembly with the boxing on top and the plate on the bottom. We will not actually start sewing near the center of this boxing, but instead will move about 2 to 3 inches away from the corner. Why? Because we want to leave one side open for the later insertion of the cushion insert or foam.

Kebo Futon Sofa Bed Red Now just sew around securing the boxing to the last plate, just as you did earlier. As we discussed, here on this side the stirpes cannot be matched up so check to be sure the corner will match up before sewing this side, on larger cushions this is very important, on small ones like this it is not. We have skipped ahead here and are coming to the last side again. We want to just go around this corner and then stop sewing about 3 inches from the corner or away from the corner. This leaves an opening for the insertion of the foam or insert in a later step. It is important to do some revering here to lock the stitch in place and also keeps the stitch from coming apart when the insert or foam is pushed inside the cover. Turn the cover right side out. Next we will sew the “mattress” style stitch along all sides and even at the corners of the cushion cover. To do this fold the fabric out flat along each seam and try to position the seam at the extreme center edge of the folded assembly, as shown in the video. Then position the assembly so the stitch starts about a half inch away from the side’s corner and about 3/8 inch away from the folded edge. To keep the first seam centered correctly, sew a few inches then bury the needle make adjustments to the assembly and repeat. When you reach the next corner, stop about a half inch away and do some reversing.

To move onto the next edge we will not even cut the trailing threads. We will simply remove the needle from the fabric, lift the foot, reposition the assembly just as we did earlier and sew onto the next corner. As you watch to see how Angela does this lets discuss the merits of using a Sunbrella Upholstery or Furniture Fabric for outdoor or indoor cushions. Sunbrella is the world’s best upholstery fabric because it is 100% solution dyed Acrylic, the colors stay bright and vibrant even if the fabric is left outdoors in the sun continually. It is also very water and stain resistant. Other brands of decorative fabrics are also available at Sailrite some are specifically made for indoor only climates others are considered an occasional outdoor fabric. If you have questions about the type of fabrics that we offer give us a call at Sailrite. This plate and boxing is now finished with the mattress style seam. Now we will move onto the opposite plate and boxing side. When sewing this do not finish or sew the side that is left open for the insertion of the foam or pillow insert. It will be sewn shut in a later step. Let’s move on and show sewing one of the corner edges of the boxing. Same procedure. After all sides, except the opening, are finished we are ready to insert the foam or pillow insert. We are going to use fiberfill for our cushion. That’s coming up next! If your cushion uses a sheet of foam skip this chapter. If it uses fiberfill, keep watching. If your cushion is using fiberfill, instead of a sheet of foam, we recommend you build a pillow insert from the spun bonded fabric we cut earlier. The construction of this pillow insert is done exactly the same why you built the cover. Except you will not be sewing the “Mattress” style seam in this. Ok, Kebo Futon Sofa Bed Reviews some of you caught the fact that the pillow insert will be larger than the Sunbrella fabric cover, good job! That is intentional we want the pillow insert to fill the cover tightly for the best look. When sewing don’t forget to keep a side open, just as we did with the Sunbrella fabric cover. We will need to fill this cover with the Polyester fiberfill. Turn this cover right side out. Sailrite sells a very large 10lb bag of Polyester Fiberfill. Sailrite’s fiber fill is slick and very soft which helps keep bunching of the fill to a minimum. This 10lb bag will stuff about 5 of this sized cushions or if you’re making a standard size throw pillow, it will typically fill about 12 to 15 of them. Here we are filling the pillow insert we just made. We will fill it so it is rather plump. For this size of cushion we believe about 2lbs of stuffing is perfect for a cushion that is about 20” x 20” x 5”. The amount of fiberfill used is completely up to the end user.

When stuffed to our satisfaction we will close up the opening. No hems will be made here, instead since no one will see this insert we will simply sew the two flaps of fabric with a single stitch. Be sure as always to revers at the beginning and end of sewing. Is it possible to get that pillow insert inside a small hole like this, yes, but it is rather difficult. So…Kebo Futon Sofa Bed In Red to make our job easier we are going to use silk film from Sailrite and compress the insert with a vacuum. Angela will lay the silk film onto the table, it is center folded, so be sure to splay open the two halves. Then she will cover the pillow on all sides overlapping the silk film by 12 inches or more. Next insert a Shopvac hose end on top of the pillow insert (so it is clear of the silk film) and turn the vacuum on. As soon as she closes up the bottom notice how the pillow insert compresses almost to half the size. This will make it easy for us to insert it inside the pillow cover. Once it is inside the cover, she will turn the vacuum off and watch how it expands. Ok, you can do one of two things here, you can leave the silk film in the cushion which does provide a level of water resistance to help keep the foam or fiberfill dry if used outdoors or you can remove the silk film from inside the cover. Silk film is excellent for easy cushion stuffing and for water resistant protection, but for a medium or soft foam it can take a while for the cushion to expand quickly when a person gets up off the cushion. So, the choice is yours. We are using a Sunbrella fabric which is already water resistant and Spun Bonded Pillow Protector which is also water resistant, so we will remove the silk film. To sew the opening closed on the cover we find it easier to remove the sewing machine from the Collapsible Sewing Table so the cushion’s weight will rest on the table as we are sewing it shut. Here we need to create a folded hem to simulate the rest of the sides of the cushion. So Angela will fold the fabric in along the two edges of the fabric and start sewing about a ½ inch from the corner and 3/8 inch from the folded edge. With the fiberfill stuffing closing or sewing up the opening is not too difficult, but if a sheet of foam were used instead you will find this much more difficult, but possible. A suggesting for the closing the opening when using a sheet of foam is used is to pin the folds in place prior to sewing. Our French Mattress Style Cushion is now complete. If you want to build one using a sheet of foam the patterning sizes are slightly different as shown in the patterning chapter, but the construction techniques are exactly the same. Coming up next is the materials list and tools that may be required to do it yourself. We used a Sunbrella Upholstery or Furniture Fabric but you will find hundreds of other great decorative at Sailrite.

Doc Sofa Bunk Bed Review

Doc Sofa Bunk Bed Review - Why does the sofa bunk bed need a security key? Though the sofa bunk bed is a good idea however no one can afford, even for a moment, to play with your safety and that of your family. Because, our sofa beds are real beds. Unlike the standard sofa bed, our sofas are real sofas and real beds. No compromise. For the sofa, we use soft comfortable paddingand pay close attention to design details. For the bed, we use only high quality anatomical mattresses guaranteed for 5 years. As you can see, the sofa changes from day to night with ease. Because our sofa beds have protective opening mechanisms. The Berto opening mechanism protects your mattress from dust. More importantly, it protects you because you don’t have to rest your legs on the iron frame to get up, but instead on a soft liner. Having a good day comes from a good night’s rest and the little things that make life easier. Because our sofas are customized for comfort For the simple fact that the softness of the seat cushion is completely up to you. Basically it works like this: you choose a sofa that you like, you sit down and if you prefer the sofa to be just that much softer or firmer, we can change it for you. This is the personalized comfort and service that we at Berto Salotti offer.


This is hard working commercial grade furniture dressed in a contemporary style Doc Sofa Bunk Bed Cost. Works very well in both the home or professional environment, it's available in both mocha cherry finish which you see here today and also a lighter cherry finish. Enterprises is a straightforward collection which offers a number of different configuration options. We have it set up today in the 72-inch L-Desk with a 72-inch hutch. It's also available in a 60-inch L-Desk with 60-inch hutch and both 60-inch and 72-inch double pedestal desks. Both sides hutches also work on the double pedestal desks. Finally, we have a lateral file and lateral file hutch and to round up the line we have a small space corner unit. Enterprise offers very quick and easy installation. The pedestals are all completely assembled at the factory and you can pull the matter out of the box and be ready to go. All pieces in the line will assemble in 30 minutes or less. Let's talk about some of the features. First the desk surface which gives you a plenty of room to spread out and gets your work done. There is also a 4-port USB hub recessed into the desk surface itself which allows you to plug in electronic devices and stay powered up.

There is also a wire management cut out in the back of the desks as well. The brush satin nickel hardware and accents also are very nice detail. The thermally fused inter thick laminate surfaces on the desktop are very durable and hardworking and we work as hard as you do. On the desk itself, we have plenty of close storage. All of the drawers feature full extension ball bearing door slides for easy access to the contents at the back of the drawer and years of use. Doc Sofa Bunk Bed Cheap Let's move onto the hutch. This tag board is a great convenient feature. You will also notice the recessed lighting underneath for extra visibility. On top, we have a mixture of open and close storage. These open and working process trays are great for storing papers, folders, books, or other items of that nature. Inside the closed storage, we have this convenient lid stay hinge which allows the door to stay up while you are accessing contents and then you simply push it down when you are done. There are a number of wire management features on the hutch including a channel on the side for routing wires and there are also cut outs on the shelves for bringing power up into the closed section of the hutch. Enterprise is backed by a 10-year manufacturer's warranty and it also tested in our laboratories to Professional ANSI/BIFMA Standards. So you can be confident that it's gonna perform as well 10 years from now as it does on the day you buy it. This is the Enterprise Collection by BBF.

If you want to make a Murphy Bed you're probably going to want a kit that contains all the hardware you need. Doc Sofa Bunk Bed Price Uk They have several different kinds. this is the DIY kit. The kit comes with a set of instructions showing you haw to build the cabinet, but as you can see, it's a lot of words and not a lot of drawings which made it a little tricky. So I took the liberty to draw up my own set of plans based on these plans. You can download these down below. I can get much more accurate cuts on my tablesaw, but I can't run huge sheets of plywood through it, so I need to break it down to rough sizes first. I'll start by building the cabinet. The first thing I'm going to do is put this iron-on edge banding on any of the exposed plywood edges. it's made out of real wood and when you iron it on, it's never coming off. This time I picked up this trimmer. It's got a razor blade in there and it should trim this flush. After a little sanding, that makes it look like a solid board. I'm screwing on these L-brackets that attach to the header and the stretchers to hold the cabinet together. They all come in the hardware kit. To make sure these are right on the end, I'm butting these up against a scrap board. I'm spending a lot of time to measure out carefully where I'm going to drill all the holes in the side panels for the lift mechanism. I was thinking I could just mark one of these side panels and then just put it on the other one and drill all the holes at the same time, but now that I think about it, I think a better plan is to actually mark the other board too because if they are stacked together and I try to drill through both boards, there is a strong likelihood that I'm not going to be completely straight and that would cause the other holes to be way off.

So I just take careful measurements on this side. I'm using a brad point bit to drill out these holes to keep it from wandering. I'll counter sink all these holes on the outsides of the panels. I want to clamp this top piece to the sides so that I can drill crews in there. I don't have any clamps that are long enough, but I can hook two of these pipe clamps together. Now I can drill holes for the special screws that are going to hold this together. With those holes drilled and the brackets installed on the other pieces, Bunk Bed Sofa I can take this all apart and I'll assemble it up in the bedroom. This part's going to be a little tricky. I need to join these two pieces of plywood together. I'm going to put biscuits all along the edge of each one first. Okay, that should hold those two pieces together. And as before, I'm taking really careful measurements and marking where the lift mechanism goes on each of the rails. And I'll drill some really tiny pilot holes through these using my drill press. I'm temporarily laying out these bed rails so that i can drill holes for those special screws into the ends. I'm marking all of these corners so that when I go to assemble this all of the holes that I've drilled here will line up. With the head and side rails still clamped down, I can test the fit on these cleats. Before gluing and screwing the cleats on the rails I need to drill holes on two sides. I'll glue and screw all of these cleats flush with the bottoms of the rails.

With those all dry, Doc Sofa Bunk Bed Amazon I can screw together all four of these rail assemblies. These are the special screws that came with the hardware kit. I'll put those into the holes I've already drilled. With that assembled, I'll carefully move it out of the way and put some glue down and screw it down using those cleats. This is a very cramped room, but I think it's going to be a lot easier to assemble this in here rather that trying to bring it into the room. I'm using these L shaped brackets to secure the unit into the studs of the wall. This is the mechanism that's going to raise and lower the bed. It gets mounted inside. The lift mechanism works really well. Here's how it works. Lift this up, the legs fold up, holding the mattress in, and then it just gently folds up. I'm really happy with the way that Murphy Bed turned out. It's going to save us a lot of space in that extra room, which we don't use that room as a guest room that often, so what we've been doing is slowly transforming it into my wife's crafts room. You may remember the video last year where I transformed the closet into a crafts organization center. And keep watching Woodworking for Mere Mortals I'll be having more space saving projects for that room coming up later this year.

[NEW] 2015 Faux Leather Sofa Bed with Storage Designs

[NEW] 2015 Faux Leather Sofa Bed with Storage Designs - I built this bed to maximize the space we have in our apartment We only have two rooms so we have to make The most of the rooms that we do have We wanted to be able to host guests And have a dining room So we needed to get rid of the bed I built this Murphy bed to maximize the space in here What I did differently, normally the legs are short On Murphy beds so the bed comes down really low And I dont like sleeping on the floor And we have a pretty high ceiling So I raised the bed up, and I built the storage down here We have space in here for guitars and folding chairs So we can pull the chairs out when we have guests When we dont use it we just keep these closed The off course are supposed to be attached But I haven’t gotten to that point yet When I open the bed I just flip up these legs It has a lock mechanism so when I flip the legs up It unlocks at the top Fold it down it's really very easy to pull it down I think I can do it with one finger Once the bed is down I just unclick these They are seatbelt straps I bought at hobby store I think you can buy them anywhere I just drilled them into the bottom of the bed So now I am ready to go to bed I built light into the bed It’s nice to have the option of just sipping a glass of water or putting a book aside and having a little reading lamp So I put lights in here I also put this upholstered headboard up And it makes it for a nice thing to sit up against.


Sofa Bed With Storage Behind it is storage. We dont have that much space So we need all the storage we can get In here we have trumpet and sewing machine equipment Up here is more storage I put magnets on the doors to prevent them from opening all the time And when the bed gets pushed down It kinda sucks the doors out we you need magnets on it In here we have a lot of storage We have three shelves We store all of our childhood memories in boxes in here We have all our beach towels that take up a lot of space We have luggage for two people And out of season clothes we dont use very often When we don’t need it which is most of the time We just keep it closed and if we do need it we can quickly get to it We to close it up again You just fasten these two strips And you can push the bed up again When I pull these legs down it locks into place And it cant come out even if I pull on it It will stay where it’s supposed to be That’s it.

Idaho Faux Leather Sofa Bed With Storage Drawer Update your bedroom by making your very own headboard. It's easier than you think. You'll need, an MDF frame, cut to the width of your bed. Spray adhesive, tape measure, pencil, scissors. Roller, staple gun and 1 / 2 inch staples, heavy linen fabric. Batting and foam. Cut foam to size with scissors and piece together. We used a thicker foam to give the headboard a more substantial look. Spray adhesive to the front of the MDF piece. Lay the foam on top and press it down with a roller to help it stick more evenly to the MDF. Add additional pieces of foam to cover the frame and adhere. Place the headboard face down on a piece of batting. Trim as needed  Be sure to leave enough to wrap around the foam and over the edge of the MDF. Staple the batting onto the MDF. Gently adjust and pull firmly each time you staple. The trick to smooth batting is to place a staple on one side. And then a staple on the opposite side, rather than working down one side at once. Continue stapling around all the edges. Save the corners for last. Notching out a square on the corners.  Staple one side. And roll over the raw edge of the other side, and staple into place.  Iron your fabric, so your headboard will be wrinkle free. And then lay it flat on the floor. Place the headboard on top of the fabric. Leaving enough on all sides to wrap around the back. Pull one side tightly and staple, then move to the other side and staple like you did with the batting. Trim excess fabrics as necessary. Repeat on all sides and fill in with more staples until the front side is smooth. For the corners, cut a notch like you did on the batting. Pull over one side and staple in place.  Fold over the raw edge of the other side and staple into place. By folding over the raw edge, you create a nice clean pleat. Secure your headboard to the wall behind your bed and enjoy your DIY work.

This is the PBteen Hampton Storage Bed and Mirror Tower Set. Our high quality bed set can be customized to suit your space while creating a clean, organized look. Crafted with a kiln dried wood frame, it features subtle moldings and tapered legs. Leather Sectional Sofa Bed With Storage The set includes a storage bed, a hutch, one left opening tower, and one right opening tower. The towers feature full length mirrors. Each beveled mirror tower includes six drawers, a large cubby with shelves, a corkboard, a tray cubby, and four handy hooks. A cubby in the middle contains five adjustable shelves. Four spacious under-bed drawers hold all of your essentials. Stow books and more in handy under bed cubbies. Pair with our mini storage baskets and bins for neat and concealed storage. Detailed with sturdy, antique bronze hardware, this collection is finished by hand in one of our exclusive PBteen finishes for exceptional richness, durability, and depth of color. The bed is available in our classic PBteen white finish, or in stained dark espresso, and comes in twin, full, and queen sizes. The slat roll foundation is designed for use without a box spring. Complete your room with a variety of dresser, desk, and bedside table options. Most importantly, our Hampton Storage Bed and Mirror Tower Set is rigorously tested to meet or exceed the highest industry safety standards.